Deploy ASP DotNet Core Web Applications on Ubuntu Linux (AWS EC2) behind Apache Server
I am writing this article as a result of my learning for deploying ASP.NET Core web applications on Linux boxes. There is a lot of information available on writing these apps, scattered all around the web.
In this article I have tried to connect all the pieces together and produced a full-fledged article on deploying ASP .NET core web applications behind apache server on Linux servers.
This article is more of hands on rather than a deep dive into the concepts. It's more about joining the two worlds of windows and Linux.
Pathway.NET Core is an open source framework, that can be used to write cross platform .NET applications. But when writing Web Applications in .NET Core, no Production Web Server provides direct compatibility to .NET applications. To solve the problem, the .NET Core community is providing a lightweight server (Kestrel server) that emulates a cross platform environment to run these web application. Being lightweight, lot of features of a production web server are missing in Kestrel server. So we hide the kestrel server behind a production ready proxy server (in this case Apache server).
PlatformFor this article, I have use Ubuntu Linux 16.04 virtual machine on Amazon EC2.
StepsHere is a list of steps that one would follow to arrive to a solution:
and of couse finally testing your application on internet
Get to work Setting Up Ubuntu Linux on Amazon EC2For this article i am using free version on Ubuntu Linux on Amazon EC2.
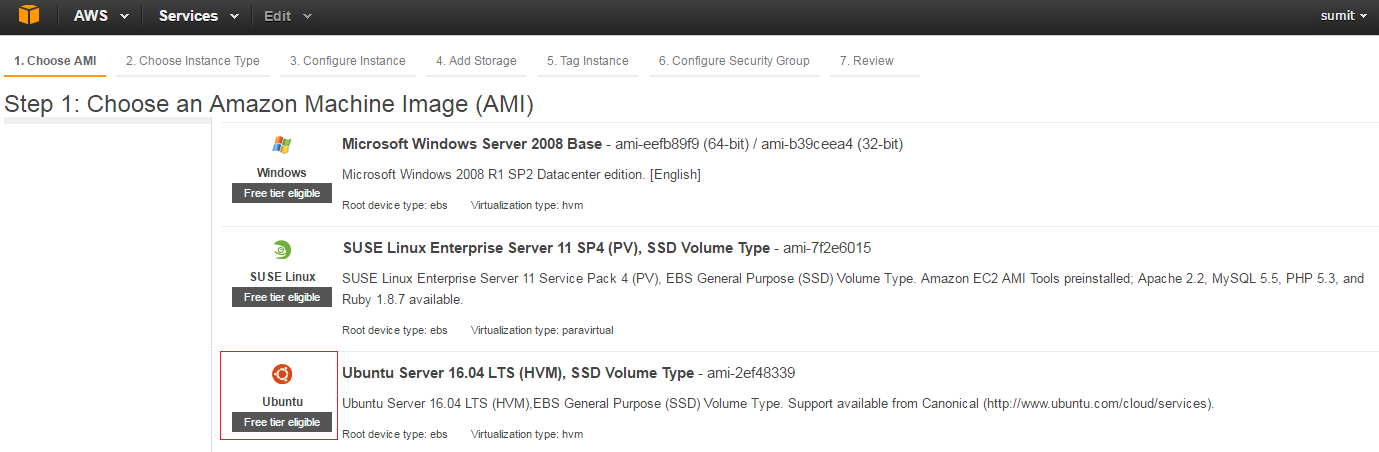
The steps to create the VM can be followed easily on https://console.aws.amazon.com
Once created, instance of your virtual machine would look something like this:

Next step is to be able to SSH to this machine. It is pretty straightforward for Linux / Mac OS . Window users generally prefer putty (available at http://www.putty.org/ ) to SSH to this remote VM.
While creating the VM, amazon will provide a private key (in *.pem format in case you choose to add a new key). This can be converted to *.ppk format using puttygen utility (available at https://winscp.net/eng/docs/ui_puttygen).
After you have generated the *.ppk file,
screens below shows how SSH connection to EC2 is opened using putty:

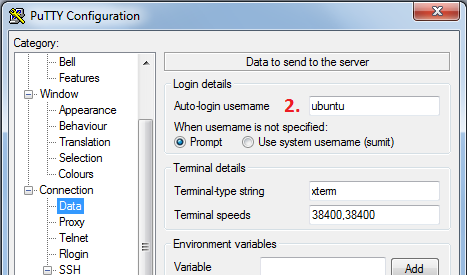
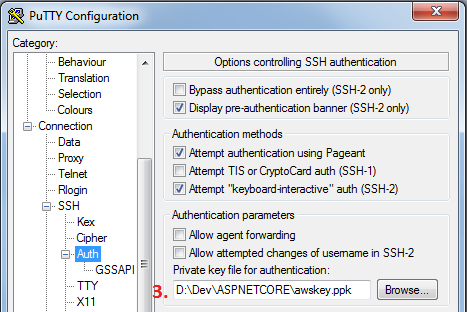
With those three pieces on information, we are ready to open terminal session to the remote machine.
Once connected, it login to the ubuntu user as show:
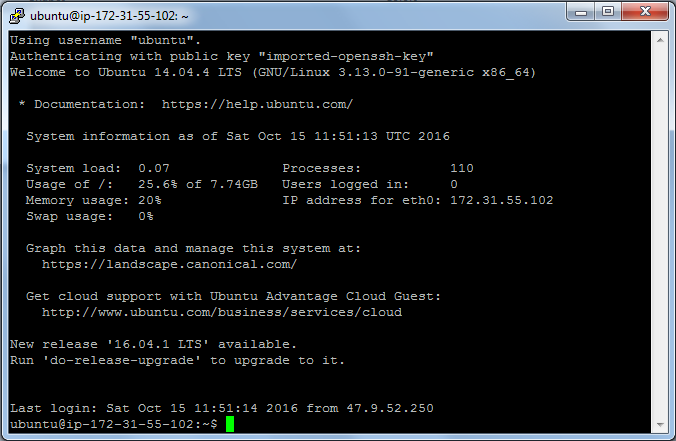
The steps are pretty straight forward and are available on the .NET Core official website http://www.microsoft.com/net/core#ubuntu. Once installed, you will be able to run the dotnet command on terminal.
Following are the commands to install dotnet from the article in the link above for Ubuntu 16.04:
the last command would confirm that dotnet is installed.
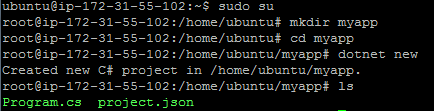
Create a .NET Core Web applicationFollowing are the steps to create a minimal .NET Core Web application, that does nothing else than saying 'Hello' on the browser.
> We create a directory for our application (here /home/ubuntu/myapp)
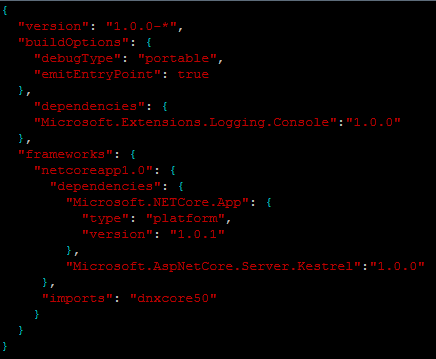
>Use vi editor (I did) , or an editor of your choice to edit the project.json file.

> Make sure your project.json file looks like the one below (here we are addding Kestrel server & logging dependencies):
if using vi editor, save the file using :w <enter> , close the file using :q <enter> (though to mention this for people who are not at all used to Linux environment).
> Next is to create a Startup.cs file.

> A lot of information is available about application startup on .Net Core official website. You might like to go through this link : https://docs.asp.net/en/latest/fundamentals/startup.html
> Next step is to add console to the loggerFactory (using AddConsole so that we are able to see logs on the terminal/command line), capture a logger instance to be used for request logging.
> Modify Startup.cs file, with a middleware (configured using app.Run), that would fuse each request that comes to the server and respond with text 'hello'.
Finally the Startup.cs file should look like the one below :

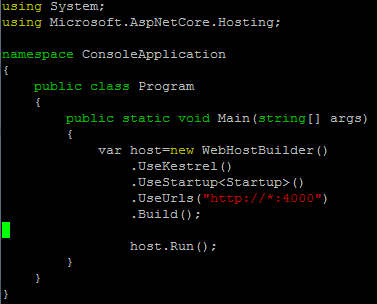
> modify Program.cs file

> The main method configure a web host to run on kestrel server, listen to URL's that match "http://*:4000".
> placing a star is ://*: is important so that when running the application, its accessible from outside world. In most articles you would find it to be localhost (e.g. http://localhost:5000 ) but that's not good enough for accessing on network.
> save the file & quit editor.
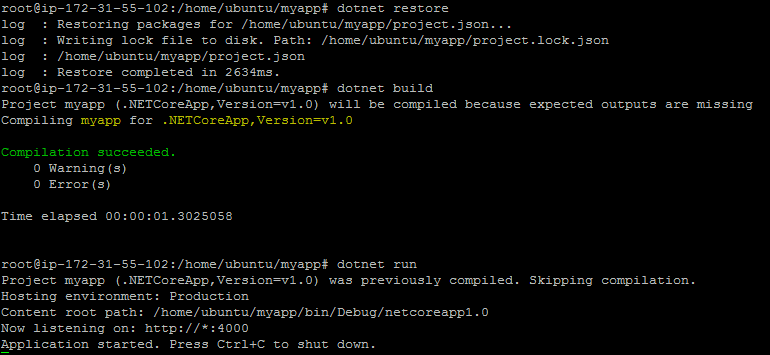
> run "dotnet restore" on the terminal
> followed by "dotnet build" and "dotnet run", scrheenshow below show that server is started and is listening the configured url.
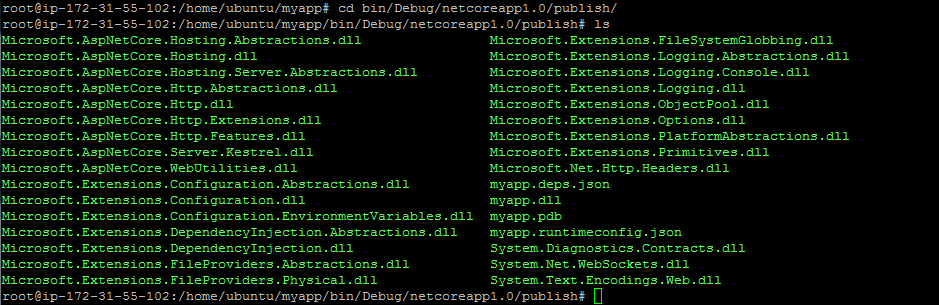
Next step is to publish the application using "dotnet publish" command.

published files are shown in screenshot below:
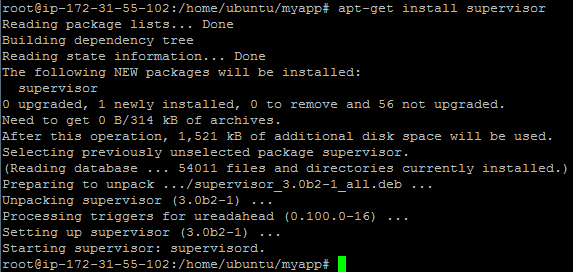
Supervisor is a monitoring application that will run & monitor our .Net Core application The configuration for the applications to run is specified in *.conf files in /etc/supervisor/conf.d/ directory.
> Install supervisor service :
> Create deployment folder in /var (in this case /var/netcore/myapp):

> Copy the published output files to deployment folder:

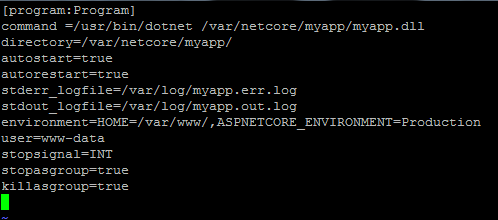
> Create configuration file for the application myapp, to be picked by the supervisor inside /etc/supervisor/conf.d directory :

myapp.conf should look like the one below :
> Stop supervisor service & start again :

In the example, we have run hosted our application on http://*:4000 , by default this port won't be accessible to the world on amazon Linux ec2 instance. To make it accessible, we need to modify our security group inbound rules, and allow tcp traffic from port 4000 as shown here:

Once TCP accss to port 4000 is enabled, we can now open the browser to test our application :
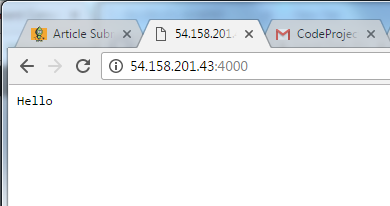
BINGO!
As we know, here the application is running on Kestrel server which is not a full fledged web server. It is recommended that in production environment we should be running Kestreel behind a production web server such as IIS, nginx or apache. Furthermore, browsers by default sent request on port 80 to the web servers. On Linux we might be running other servers & applications such as tomcat / nginx etc.. So its not a good idea to expose Kestrel server directly on port 80, since it would block the port 80 (not being capable enough to act as proxy server / load balancer). So its best to have a full fledged server routing the requests to required port on the machine.
In this example we will place our kestrel sever behind the apache server using reverse proxy. The details are listed below.
Install Apache server on Linux:install apache2 using following command:
"apt-get install apache2"
It would start automatically, and you will be able to check the default page on your browser:

The default page that can be seen above is configured in apache config files available at /etc/apache2/sites-available/
Let's say we want to run our 'myapp' application on the url http://<domain name>/myapp ,
we can make changes in configurations to assing proxy from /myapp to localhost:4000 (where myapp is hosted on kestrel). The steps to do this are listed below:
> Disable default configuration of apache server using a2dissite (the default config file is 000-default.conf)

> create proxy configuration file in /etc/apache2/sites-available/proxies.conf
> make entries to add /myapp as proxy to the url http://localhost:4000 (the kestrel server url for myapp). the proxies.conf file should look like the one below:

> enable proxy configuration using a2ensite command

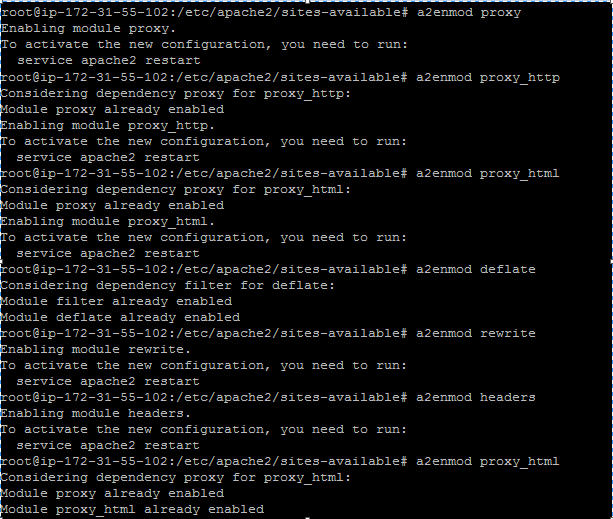
> enable mod proxy using following commands :
> restart apache2 using "service apache2 restart"

> Test the application from default port using proxy path (http://<domain or ip>/myapp in the browser as shown:

And we are done!
Our application is running on the default port :80/myapp!!
Referenceshttps://docs.asp.net/en/latest/
Source: Deploy ASP DotNet Core Web Applications on Ubuntu Linux (AWS EC2) behind Apache Server
0 comments:
Post a Comment